There are many ways to heat a living space and much the same as the stock market, diversity can be an important consideration. In other words, having more than one option can be handy, especially if there is a power failure.
Jøtul Wood Stove Installation
It has come in handy more than once during winter storms but more important for me, there is a certain coziness that a fireplace brings to a room but traditional open face fireplaces are notoriously inefficient, often taking away almost as much heat as they provide. This is where a good wood stove comes in. There are actually a lot of options, plain wood stoves, pellet stoves, stoves with catalytic chambers for cleaner burning, gas stoves and they are manufactured all around the world.
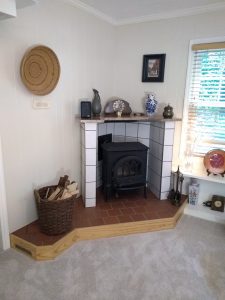
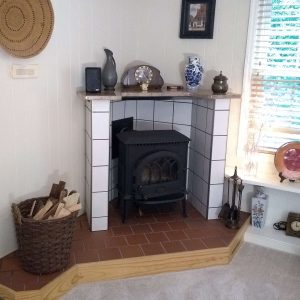
Our preference is for a look that is not modern or contemporary while also not really old-fashioned. For two different homes we selected this stove made by Jøtul of Norway but there are options for every style.
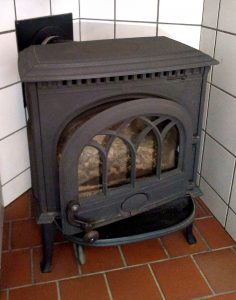
This is the ‘Clean Burning’ version of the Jøtul F3. It is in a smaller class as we were not looking to heat the entire house but it still provides plenty of heat and, if conditions demand it, the stove can heat multiple rooms.
This stove is connected to a prefabricated insulated Class A double wall stainless steel chimney (U.L. 103 HT) that exits at the roof. Keeping the chimney inside the house is a far more complicated and cumbersome installation process, as you are confronted with walls and ceilings and more care needs to be taken when passing through combustible material but the performance is significantly better. In winter, chimneys that run on the outside of a home are cold. Hot air rises while cool air falls which makes a cold chimney almost a roadblock that can virtually eliminate any air draw. Because an interior chimney is a bit warm, there is always a draw, allowing easy starting and efficient operation.
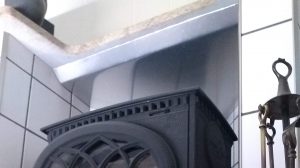
Needless to say, wood stoves get hot so without a proper insulating layer between it and the house you would be tempting fate. Check local codes and the specifications for your stove but for any relatively close installation, generally at least a 1” air gap is needed between a heat deflecting surface and any combustible surface such as a wall and air needs to be able to flow through that gap.
![]()
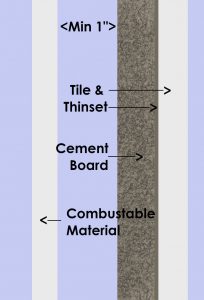
Air Gap before combustible surface
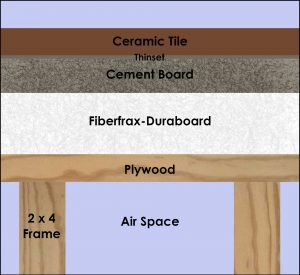
Wood Stove Platform Layers
![]()
This design incorporates a multi-layer highly fire resistant floor made of tile, cement board and an unnecessarily think layer of Fiberfrax-Duraboard. Duraboard is one of a few high-temperature fiber board products designed for insulating in extreme temperature environments such as blast furnaces. Those layers sit on a plywood and wood frame while the hollow walls are ceramic tile on cement board fastened to a steel frame.
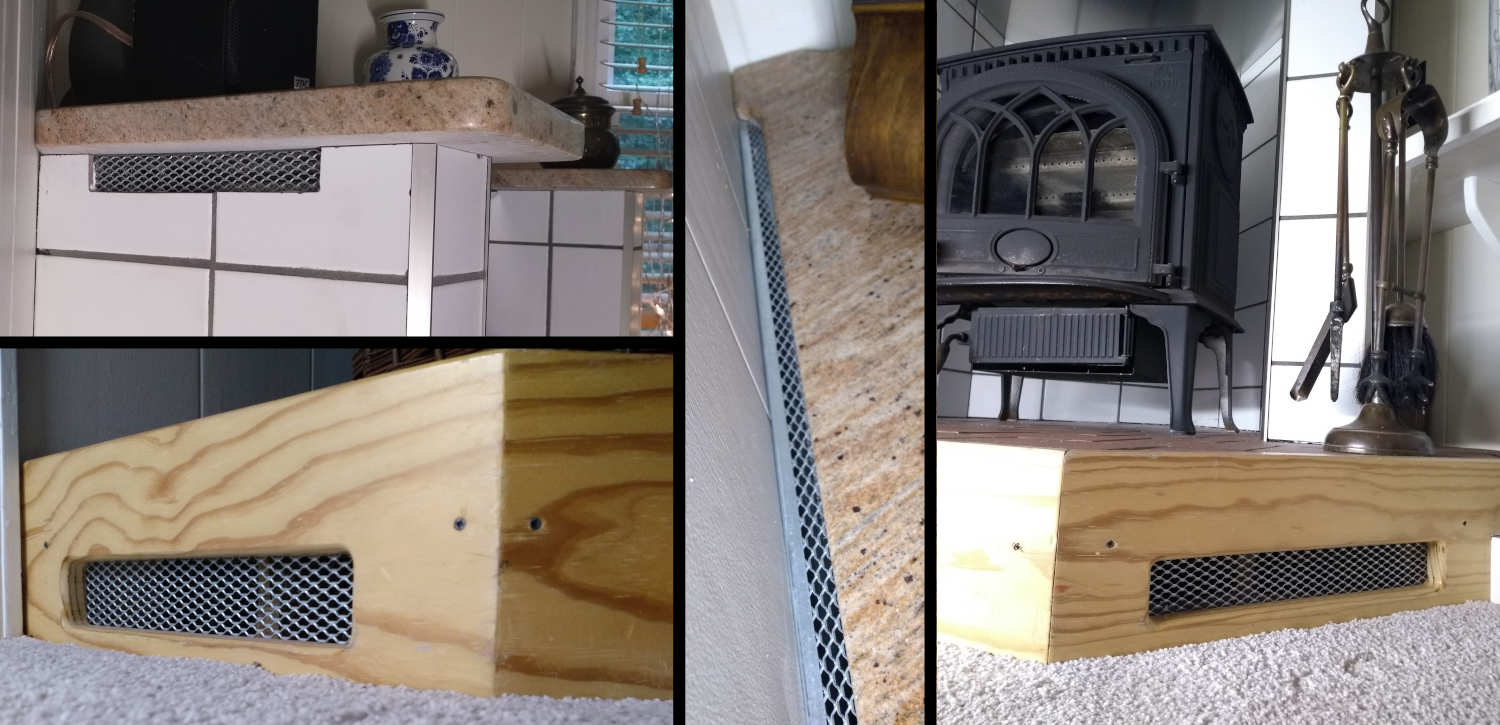
The base has vents at the ends to allow air to pass through to the side and rear walls of the enclosure and then up to top exit vents. The air flow is continuous which keeps the insulating air gap cool.
The base extends out quite a bit from the front of the stove to catch any embers that might escape when the door is opened and one side is extended to provide an out of the way storage spot.
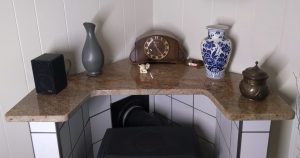
Topping but not really covering the stove is a 3cm U shape granite slab with a lightweight aluminum heat-shield. Because the slab does not really cover the stove, much of the heat simply flows out but some could get trapped so a heat-shield is installed below the granite.
The heat-shield and air-gap help direct heat out, keeping the slab at room temperature so anything on top is not adversely affected.